The Travel Expenses application is an easy to use app which helps you organize the expenses you have in relation to a business trip. Simply enter the amount of an expense, you may also take a picture of the receipt, and all the information is stored on the phone. When the time comes to extract the data you've entered, you can export to an Open Document file or a CSV file. The file can be transmitted over e-mail or retrieved from the phones sd-card (or other internal storage).
If you would like to request a new feature to be added to the Travel Expenses app, please feel free to leave a comment on my blog.
User requested features:
- CJ posted a comment on November 6th 2011:
- Time fields for trip start/end
- Fields for number of breakfasts, lunches or dinners to be subtracted for each travel.
- CJ posted a comment on November 23rd 2011:
- An option for a page break for each travel when exporting to open office. (One page for each travel)
- A possibility for marking specific travels for export. I realize that status could be used to do this, but as I have found good use for the existing statuses, it would be nice to have a new status option to control the export (ready for export). Alternatively there could be an option to export a specific travel from the Main Screen by long clicking on a travel.
As of version 1.8, all these features have been implemented.
New features in version 1.8
- Added a time field for the start and end of a trip respectively
- Enable the user to add a recurring expense (like breakfast, lunch, dinner etc.) to each day of a trip with a few simple clicks. For example, for a trip lasting five days, the user will be able to add a breakfast entry for each day by doing the following:
- Click the "Recurring" button on the trip details screen
- Selecting the expense type ( "Food" )
- Enter the number of items to add for each day ( in this case 1 )
- Enter the total number of items to add to the trip ( in this case 5 )
- Enter the date to start adding the items ( the date the trip starts )
- Entering the amount of the expense ( let's say 10.00 )
- Optionally entering a comment ( "Breakfast" )
- Clicking "OK"
New features in version 1.7
- Export a single trip from the overview screen by long clicking it and selecting "Export"
- Added a new type of status for the trips: Ready to export
- When exporting any number of trips from the export screen, the user will be able to add page breaks between each trip.
New features in version 1.5
- Backup all the data, including the images of receipts
- Restore all data from a backup file
- House keeping, to remove old entries from the database
When the time comes to file your expenses, the Travel Expenses application, will output all your expenses related to your trip or trips in a single CSV file which can be opened with most spreadsheet applications. In addition you'll be able to export to the OpenDocument Text format. The great thing about exporting to a text document is that you'll also get the image of all the receipts in the document.
Open Document text files can be opened with lots of applications. OpenOffice, LibreOffice and even the latest versions of Microsoft Office.
How to use
The Main Screen
 |
| The main screen |
- Select which business trips to view in the list
- Open business trips
- these are trips which are currently in progress, or that haven't been closed by the user
- Closed business trips
- these are trips which have been closed by the user
- Processed business trips
- these are trips which have been processed, and the user has marked them as processed
- All business trips
- the list will display all the registered business trips
- Create a new business trip by clicking the "New" button
- View a list of the business trips with the status selected in the topmost spinner control
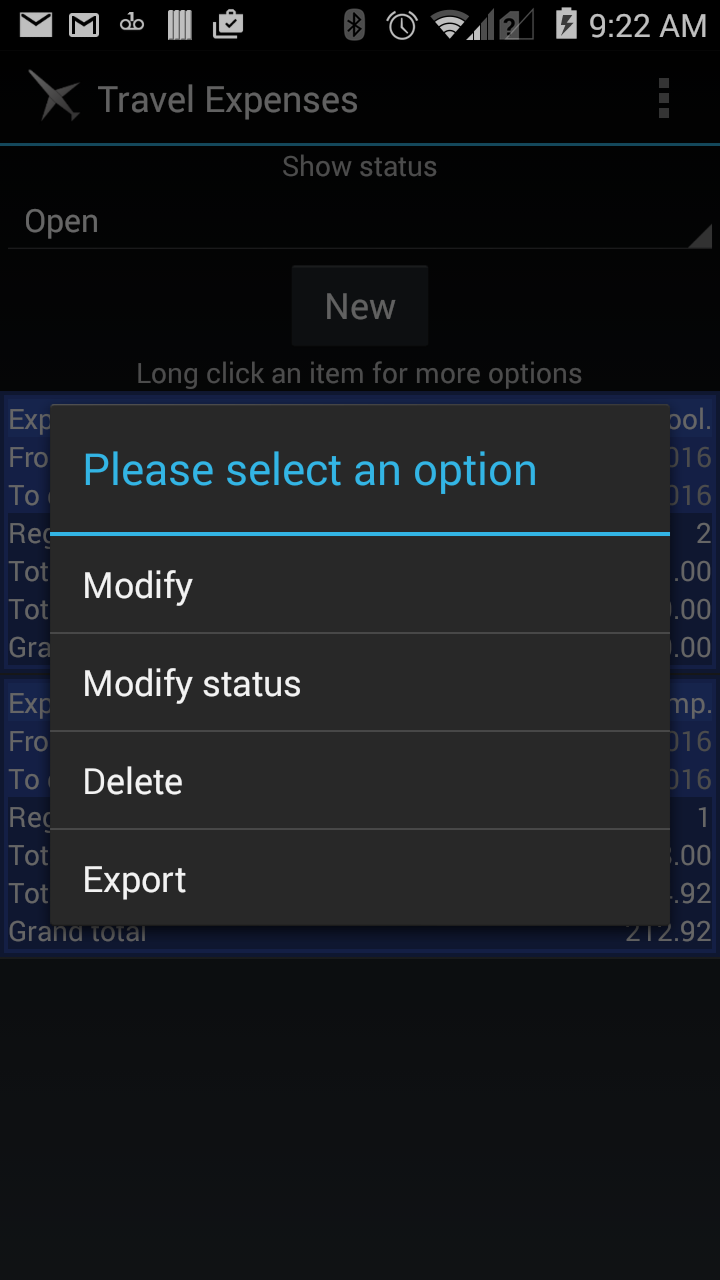
- By long clicking an item in the list (leaving your finger pressed on an item for about two seconds) you'll be able to modify, delete and export individual trips.

Modify, delete and export
The trip details screen allows you to add new expense items and
 |
| Trip details screen |
- Enter a description of the trip in the top most edit field
- Push the "From date" button and select a departure date
- Push the "To date" button and select a return date
- Click the "New" button to add a new expense item to this trip
- Click the "Save" button to save the trip and return to the main menu
- To return to the main menu without saving you can click the "back" button on your phone
- To modify or delete an expense item, long click on the item and you'll be shown a popup menu where you can select modify or delete
 |
| Modify or delete an item |
Expense item details
The expense item details screen allows you to enter an expense item for a trip. By either clicking the "New" button on the trip details screen or long clicking an item on the trip details screen and selecting "Modify" you'll be able to enter the details of the expense item.
 |
| Expense item details |
- Select the type of expense in the Spinner control at the top
- Select the date by pushing the "Date" button
- Select the currency by pusing the currency drop down list
- Push the Amount button and enter an amount
- Select the tender type by pusing the "Paid by" drop down list
- Optionally enter a comment for the expense
- Push the "Take receipt photo" if you wish to take a picture of the receipt.
- Push the "Save" button to save the details
 |
| The setup screen |
- Enter one email address per line (press the enter key to get to a new line)
- Push the "Save" button to save the list of email addresses
- Click the "Backup" button to start a backup of your data
- The file created will contain the date of the backup
- The file contains all the data currently in the database as well as all pictures
- Click the "Restore" button to restore a backup
- You will be prompted to select the file to restore
- All data and images will be replaced
- Click the "Clean up" button to remove old entries
- You will be prompted to select the status of the entries you wish to delete
Export the details to a file
You'll be able to export the details of any number of business trips to a single file. You do this by selecting which trip statuses you want to export. After you've exported one or more trips, you'll be prompted to change the status of the trips.
 |
| Export several trips |
- Select an export type from the Spinner control at the top of the screen
- Select which trip status should be exported
- Export all closed trips
- This will export all the trips with the status "Closed"
- Export all open trips
- This will export all the trips with the status "Open"
- Export all processed trips
- This will export all the trips with the status "Processed"
- Export all trips
- This will export all trips, regardless of their status
- Click the "Export" button to export the data
Configuring expense types
You'll be able to add your own custom expense item types. You also have the ability to set a default amount for any of the expense item types.
 |
| Configure expense types |
By default the items shown in the image on the right already exist. You'll be able to modify them if you wish.
To modify an expense type, simply long click the item in the list, and then select "Modify" when the popup appears.
To create a new expense type click the "New" button at the top of the screen
Enter a name in the edit field at the top of the screen.
 |
| Configure fixed amount items |
Optionally, check the check box in order to enter a default amount for this expense type. This value will be entered into the amount field in the expense details screen when you select this item in the spinner on that screen.
Click the save button to save the expense type